TL;DR
A closet rig mainly reduces noise through proper placement and sound absorption, not true soundproofing. Using soft materials, strategic mic placement, and ventilation makes a big difference in sound quality and noise levels.
Ever tried recording vocals or working on audio in a tiny closet and ended up with a muffled, echoey mess? You’re not alone. The secret to a great-sounding closet setup isn’t just slapping foam on the walls. It’s about understanding what noise really is—and where it’s coming from.
This guide will show you how to turn a cramped, reflective closet into a quiet, controlled environment. Whether you’re a streamer, podcaster, or home studio hobbyist, you’ll learn how placement, materials, and ventilation make all the difference. No fluff, just practical advice for real-world results.
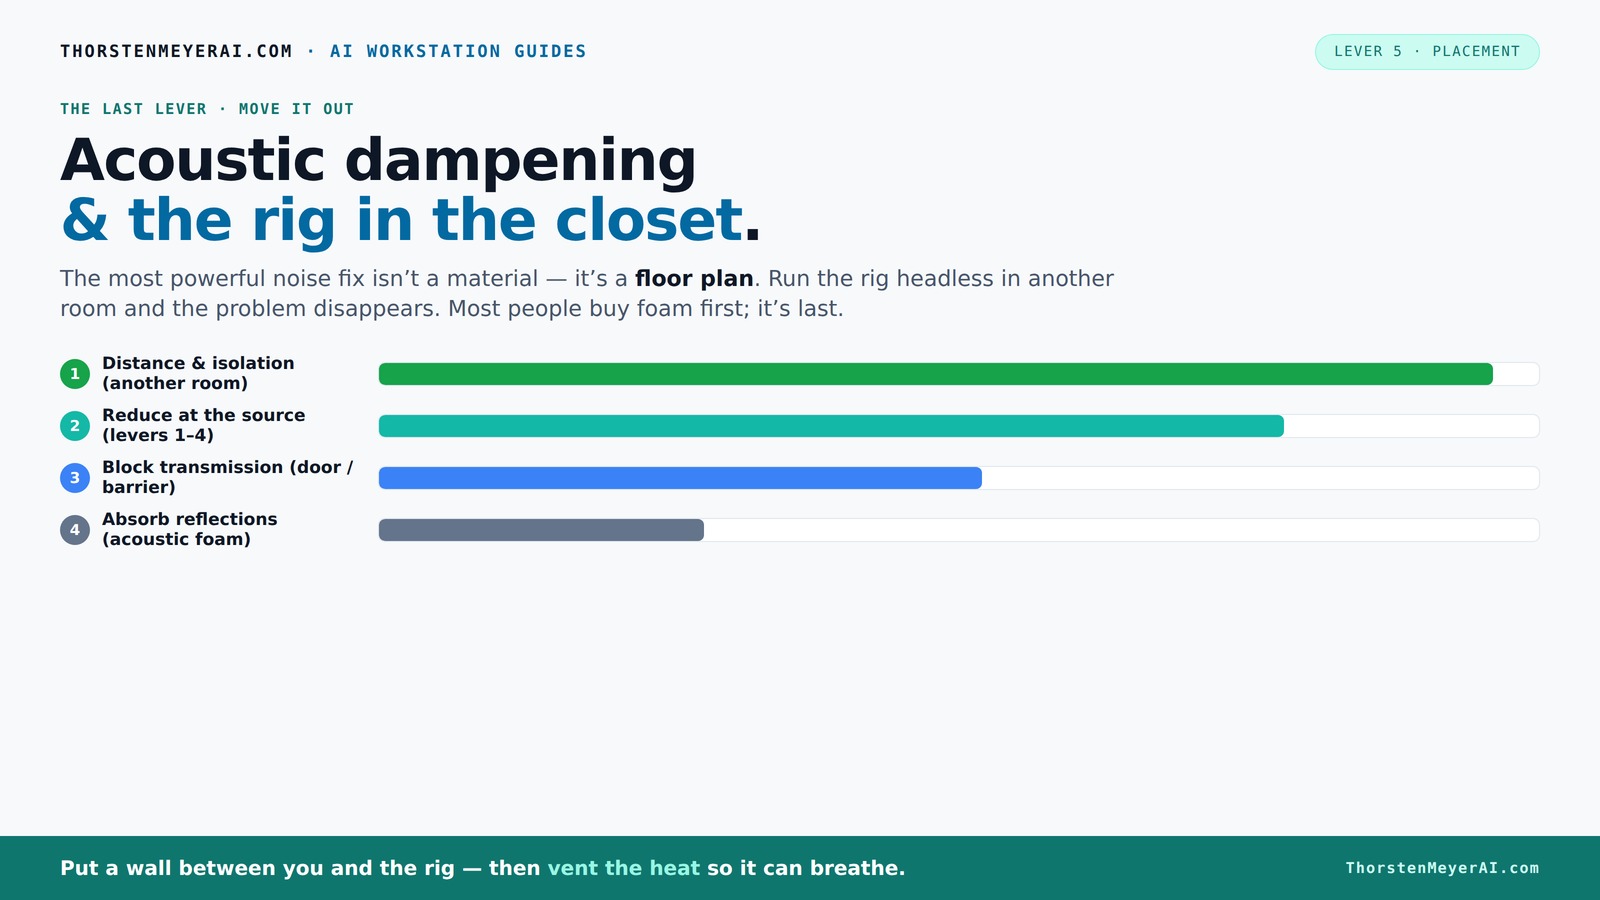
Acoustic dampening
& the rig in the closet.
The most powerful noise fix isn’t a material — it’s a floor plan. A rig you can’t hear because it’s in another room beats any amount of foam. Tap the approaches in Part 1 to see what actually works.
(another room)
(levers 1–4)
(door / barrier)
(acoustic foam)
Contain the noise, not the heat
Key Takeaways
- Most noise in a small space comes from reflections and low frequencies, not just the source itself. Learning about kitchen acoustics can help optimize your room for better sound.
- Use soft, porous materials—blankets, foam panels, carpets—to absorb sound; treat reflection points and corners first.
- Placement of the mic and talent dramatically affects sound quality—keep the mic away from reflective surfaces and angle it properly.
- Sealing gaps around the door and covering hard surfaces prevents sound leaks and reduces echo.
- Ventilation is critical; use quiet fans or passive vents to keep temperatures safe without introducing noise.

HERTBER 24 Stück Akustikschaumstoff, Schalldämmung Selbstklebend, 30 x 30 x 2,5cm Keil Akustikpaneele Selbstklebend, Schallschutzplatten für Tonstudio, Büro, Decke
【3D-Struktur & hohe Dichte】 Die 3D-gewellte Oberflächenstruktur des Keilschaums vergrößert die Kontaktfläche mit den Schallwellen und ermöglicht so...
As an affiliate, we earn on qualifying purchases.
As an affiliate, we earn on qualifying purchases.
What a Closet Rig Can and Can’t Do for Your Sound
A closet rig is mainly about dampening echoes and controlling reflections, not soundproofing the outside world. You can cut down on reverb and make recordings clearer by adding soft materials. But blocking sound from escaping or entering requires sealing gaps and heavy barriers.
For example, a DIY closet booth with blankets and foam might make your vocals sound warmer and less echoey, but it won’t stop your neighbor’s lawn mower from seeping in through the door cracks.
Think of it as turning a reflective echo chamber into a more controlled space. It’s perfect for voiceovers and singing, but not for isolating your space from noisy neighbors.
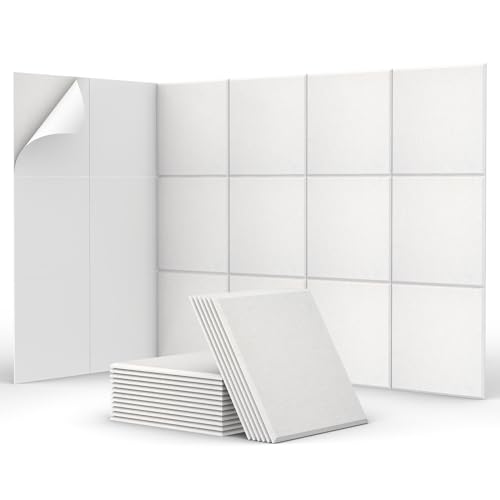
TONOR Akustikpaneele selbstklebend, 18 Stück Quadratische 30x30x0,9 cm Schalldämmung Schallschutz Akustikplatten, Schallschutzplatten mit Hochdichte Wandfliesen aus Polyester für Wand/Decke/Tür, Weiß
Hervorragende Akustik: Erleben Sie optimale Schalldämmung durch unsere hochdichten Schallabsorber aus 100% Polyesterfaser. Mit einem Schallabsorptionsgrad von 0,9...
As an affiliate, we earn on qualifying purchases.
As an affiliate, we earn on qualifying purchases.
Best Materials for Dampening Inside a Closet
When choosing what to hang or tape inside your closet, soft, porous materials work best. Think moving blankets, foam panels, thick carpets, and even old quilts. These materials absorb sound waves, reducing echo and preventing reflections.
For example, hanging a thick blanket over the door and lining the walls with foam panels can dramatically improve vocal clarity. Bass traps in the corners help tame low-frequency boominess that small, parallel-walled closets often develop.
According to DIY creators, covering every hard surface—shelves, ceiling, and door—will make your space sound more like an intentional studio booth than a boxy echo chamber.

CAHAYA 5 Panel Mikrofon Isolation Schallschutz: 180° Einstellbare Mikrofon Pop Filter Schallabsorbierend, Faltbar Mic Isolation Schild für Aufnahmestudio Aufnahmen
Doppelte Verwendung: Dieser 5-teilige Mikrofonisolationsschutz kann direkt auf einem Schreibtisch verwendet oder für vielseitige Aufnahmekonfigurationen auf einem Mikrofonständer...
As an affiliate, we earn on qualifying purchases.
As an affiliate, we earn on qualifying purchases.
Where to Place Foam, Blankets, and Bass Traps for Best Results
Placement is everything. Start by identifying the primary reflection points — spots where sound bounces directly into your mic. Usually, that’s behind and to the sides of the mic, as well as the ceiling. For more tips, check out this guide on acoustic placement.
Put foam panels in these spots to soak up reflections. Bass traps belong in the corners because low-end frequencies tend to collect there, creating a boomy, uneven sound.
For example, a streamer I know placed foam behind her microphone and wrapped her door in a thick blanket. The result? A much clearer, more professional vocal sound, without extra echo.
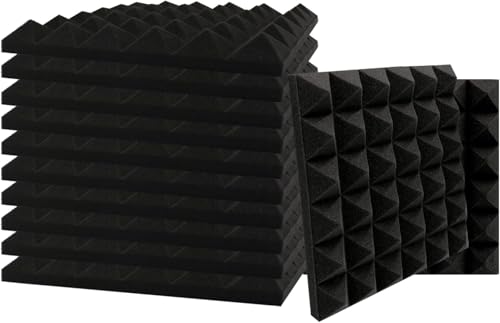
SK Studio 12 Stück Akustikschaumstoff Noppenschaumstoff Akustik Schaumstoff Schall Dämmung für Tonstudio Schallabsorbierende Dämpfungswand Schaumpyramide 30x30x5cm, Schwarz
MEHRFÄRBIGE OPTIONEN – Diese feuerhemmenden Paneele sind in verschiedenen Farben erhältlich, die für ästhetische Looks und Designs gemischt...
As an affiliate, we earn on qualifying purchases.
As an affiliate, we earn on qualifying purchases.
How to Position the Microphone and Talent for Clearer Recordings
The mic’s position can make or break your sound. Keep it at least 6-12 inches away from reflective surfaces like walls or shelves. Use a boom arm or mic stand to keep it steady and consistent.
Place the talent slightly off-center, facing away from the walls to minimize reflections. A small angle toward the mic helps capture a warm, direct sound while reducing room noise.
For example, a singer moved her mic a few inches away from the wall and angled it toward her mouth. Her recordings went from muddy and echoey to crisp and focused.
How to Treat the Door and Other Reflection Points
The door is often the biggest leak and reflection point in a closet. Seal gaps with weatherstripping or acoustic sealant. Add a blanket or foam around the door edges to block sound escape and reduce reflections. You can also learn more about effective soundproofing techniques at supportbreakfast.com.
Cover hard surfaces near the door, like shelves or hooks, with soft materials. This prevents sound bouncing back into your mic.
For example, sealing the door gaps with weatherstripping cut noise by half, making the space much more controlled for recording.
How to Deal with Shelves, Desks, and Hard Surfaces Inside the Closet
Every hard surface acts like a mirror for sound. Cover shelves with soft fabric, drape blankets over desks, and add foam panels on reflective surfaces. This keeps sound from bouncing around and creating a boxy, boomy tone. For more on optimizing your space, visit airfryerhub.com.
For example, wrapping a foam sheet around a metal shelf or hanging a blanket over a wooden desk can turn a reverberant space into a more neutral recording zone.
Remember: the goal is to break up the sound’s path, not deaden it completely.
How to Avoid a Boxy, Boomy, or Claustrophobic Sound
Small, reflective spaces tend to sound boxy or boomy because of standing waves and low-frequency buildup. To combat this, focus on bass traps in the corners and diffusers on the ceiling if possible. Learn more about acoustic treatment at this resource.
Use a combination of absorption and slight diffusing to keep the space feeling natural, not dead. Adjust mic placement and try moving the mic slightly closer or farther from your mouth to find the sweet spot.
For example, adding bass traps and angling the mic helped a musician get a fuller, richer vocal tone without the annoying echo.
Budget vs. Higher-End Closet Booths: What Works for You?
Inexpensive solutions include moving blankets, DIY foam panels, and strategic placement. These can drastically improve sound, especially for hobbyist projects. However, they might not fully control low frequencies or eliminate leaks.
Higher-end setups use purpose-built soundproof panels, custom bass traps, and active ventilation systems. These can cost hundreds or thousands but provide cleaner, more professional results.
For example, a home streamer built her closet booth with thrifted blankets and foam, and it worked perfectly for her YouTube videos. For studio-quality voiceover work, investing in a sealed, ventilated enclosure might be worth it.
Managing Ventilation and Heat in a Closet Rig
Ventilation is a must. Your rig in the closet will generate heat, especially with high-powered GPUs and CPUs. Without airflow, temperatures can soar, throttling performance and risking hardware damage.
The trick is to add quiet fans or passive vents that let hot air escape without adding noise. Use ducting or purpose-built soundproof exhaust systems for best results.
For example, a streamer installed a small exhaust fan with a duct that vents outside. Her PC runs cool and quiet, and she avoids the risk of overheating.
Frequently Asked Questions
Is acoustic dampening the same as soundproofing?
No. Acoustic dampening reduces reflections and echo inside a space, making recordings clearer. Soundproofing blocks sound from escaping or entering. Most closet setups focus on dampening, not full soundproofing.
How much treatment do I need for a closet booth?
Start with the reflection points behind your mic, ceiling, and corners. Add soft materials on the door and hard surfaces. You can always add more if needed, but a few well-placed panels make a big difference.
Should I treat the walls, ceiling, or all three?
Prioritize treating the reflection points—walls behind the mic, ceiling, and corners. Covering every surface isn’t necessary, but focusing on these spots helps control echo and low-frequency buildup.
Where should I place the microphone in a closet?
Position it about 6-12 inches away from reflective surfaces, slightly off-center, angled toward your mouth. Avoid placing it right next to walls or shelves to reduce unwanted reflections.
Do I need bass traps in a small closet?
Yes, especially if you notice boomy or uneven low frequencies. Bass traps in the corners help tame low-end buildup, creating a more balanced sound.
Conclusion
Transforming a closet into a usable, quiet recording space is about strategic placement, smart use of materials, and proper ventilation. It’s not about absolute soundproofing but about controlling reflections and low-end buildup to get clear, professional-sounding recordings.
Remember: a well-treated closet isn’t just for silence—it’s a controlled environment that emphasizes your voice and reduces distractions. Your next step? Pick your materials, treat those reflection points, and keep the airflow flowing. Your recordings will thank you.